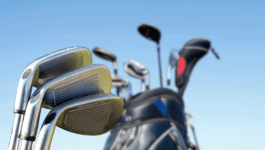
Why Paint Golf Clubs?
Golf clubs go through wear and tear, paint can chip. Before you throw out your old clubs, make sure that they need replacing or are they just looking worn out. A coat of the correct golf club paint can restore your clubs to looking like new again.
A new coat of paint or using paint to repair chips sky marks, and scratches can increase the resale value of the clubs. Golfers take pride in their equipment, so repairing a scratch or chip could in some cases be purely cosmetic.
A fad that is becoming increasingly popular is to Customise a golf club. Custom paint fill refers to re-coloring the embossed elements of your golf clubs such as Logos, names, and, numbers on your irons.
All irons, Hybrids, Drivers and, Putters can be paint-filled. It can give your clubs a unique appearance and, can also assist in golf club identification as the painted numbers of each club or the loft of a hybrid stand out clearly.
Best Type of Paint to Use
At a glance: Best Paint For Golf Clubs
- Our Top Pick: Ecovue Premium Paint Pens
- G-Paint Golf Club Paint
When looking for suitable paint to repair chips, scratches or, scuff marks, it is essential to choose a paint that will withstand the heavy impacts that all golf clubs will encounter.
Three main types of paint are suggested for the painting of golf clubs.
- Enamel Paint. Enamel paint and preferably epoxy-based enamel paint is highly recommended. Enamel is oil-based, adheres easily to metal surfaces, is highly durable, and, has a gloss finish.
- Acrylic Paint. This paint is water-based and drys quite quickly and is cheaper than enamel paint. Although there are top-quality Acrylic paints that will be a suitable paint for golf clubs it is not as durable and should therefore be regarded as a second choice.
- Two-Part Urethane Automotive Coating. Many regard this as a good product for painting golf clubs, for its high gloss finish and durability. Is more expensive and because it is spayed on is not economical for Custom Paint Fill Applications.
How to Paint Golf Clubs
The reasons for the painting of golf clubs can be to repair chips on a driver, paint the complete shaft or, Custom paint fill.
Irrespective of what purpose you are using the paint for, there are several steps that have to be followed before applying the paint.
Materials Required
- Paint Remover. Acetone can be used. Make sure that strong latex gloves are worn to protect your hands.
- Water-based degreasing agent
- Microfibre cloth
- Masking Tape – To tape up areas that are not to be painted.
- Etching Primer – If primer is not in a spray can then use a spray bottle.
- Polishing micro-fine sandpaper
- Epoxy-based enamel paint
Steps to Follow.
1) Removal of existing paint from the golf club.
Place Acetone in a suitable bowl and allow the golf clubs to soak in the paint remover. It is recommended that clubs soak for at least six hours allowing the acetone to permeate to all the difficult places to reach.
Making sure you are wearing latex gloves use a sharp metallic object to scrape the old paint off the club heads. Use a nail to remove paint from the letters, edges and, difficult-to-reach places.
Once you are satisfied that all old paint has been removed, using a degreasing agent and microfibre cloth make certain that all of the acetone and old paint has been removed ensuring that the club is free of any dirt that could affect the paint from adhering to the club. Allow the clubs to dry completely.
2) Apply Primer
Use masking tape to cover those areas that do not require painting. Spray a very thin layer of etching primer to the club. A thick layer could cause the primer to drip down and form an uneven coating. Ensure that all areas requiring painting have been covered by the primer.
3) Application of Paint
Once you are sure the primer is dry and cured, make sure you have a smooth even surface with the use of micro-fine sandpaper. Apply a thin, even layer of epoxy-based enamel paint using a spray can or spray gun.
Allow the paint to dry ( 30 TO 40 minutes) Use sandpaper to ensure a smooth, shiny surface, repeat the process at least 4 times.
Once you have taken the masking tape off, very carefully remove any unwanted paint from the club using acetone-soaked q-tips. Clubheads must be left to dry for at least 24 hours before being ready to use.
How to Customise your Golf Clubs
Customizing your clubs refers to changing the color of the embossed areas on your club such as names and numbers. This has become an increasingly popular way among golfers to personalize their clubs known as Custom Paint Fill
As with painting the whole club, the same initial prepping must be followed ensuring that all paint is removed from the areas to be painted. Once cleaning is satisfactorily completed and areas to be painted are dry Custom Paint Fill can commence.
There are 3 main methods to apply the paint. 1) Dip a toothpick into paint and apply paint to the required embossed area. 2) Use a needlepoint applicator to fill the area. 3) Paint Pens.
Once the paint has been applied to the required area using your preferred method, allow the paint to dry With all three methods it will be necessary to smooth out and remove excess paint and clean up any spillage onto the clubs ensuring that the paint remains only in the area you want to fill.
When removing excess paint. Wrap a cleaning swab soaked in acetate around a razor blade or any flat straight object. Rapidly wipe the swab over the area. Replace with a cleanly soaked swab if dirty. Repeat these steps until the club surface is completely clean. Do not use Q-tips as they can cause an indentation on the surface of the paint.
The process can be repeated 2 or 3 times to create a deep glossy color. Allow the paint to dry and mature for at least 24 hours before using the clubs.
The following are examples of the 2 most common and effective methods of applying paint fill to customize your clubs
Quick Overview: Best Paint For Golf Clubs
| IMAGE | PRODUCT | DETAILS | |
|---|---|---|---|
OUR RATING: 4.6/5 | Ecovue Premium Paint Pens |
| VIEW ON AMAZON → |
OUR RATING: 4.4/5 | G-Paint Golf Club Paint |
| VIEW ON AMAZON → |
Paint Pens

Ecovue paint pens are easy to use and produce accurate and smudge-free results when paint filling letters and, numbers
These paints have bright, vibrant colors that are permanent, waterproof and, dry quickly.
Needlepoint Applicator

Using G-Paint golf club paint is an easy way to Custom Paint Fill your golf clubs. The recommended set consists of 4, 0,3 fl oz bottles with Black, White, Red and, Blue colors It can be applied to numbers, letters and, all embossed areas of your club.
It is easy to apply with a small needlepoint applicator providing accurate results. The paint, touch dries within 30 minutes and is fully dry within 6 hours. It is suggested that only one coat is required. If you feel that the color is not intense enough, add 1 or 2 more coats.
G-Paint is durable, providing long-lasting results and making your old clubs look like new again. The colors can be mixed to create color combinations. For example, white plus red will give you pink. G-Paint is compatible with most brands of golf clubs.
Final Thoughts
Choosing paint to repaint your golf clubs or to Customize your clubs with paint refill can depend largely on durability and, frequency of having to repaint the clubs plus ease of application. Epoxy-based enamel paint is recommended as the Best Paint for Golf Clubs.
Please add your feedback in the comments section below.
Related Articles
- The Best Epoxy For Golf Clubs
- How To Clean Rusty Golf Clubs; Get Them Back To Good As New!
- Why Do Golf Clubs Break? Are We Always To Blame?
Nick is the founder of GolfSpan and an avid golfer. He's not quite a pro but has over 15 years of experience playing and coaching golfers worldwide. His mission is to bring the golfing community a better experience when it comes to choosing the right golf gear and finding the right setup for your game.